Rooms & Occasions
The Home Bar Cart: How to Set Up and Style One That Works
6 min read
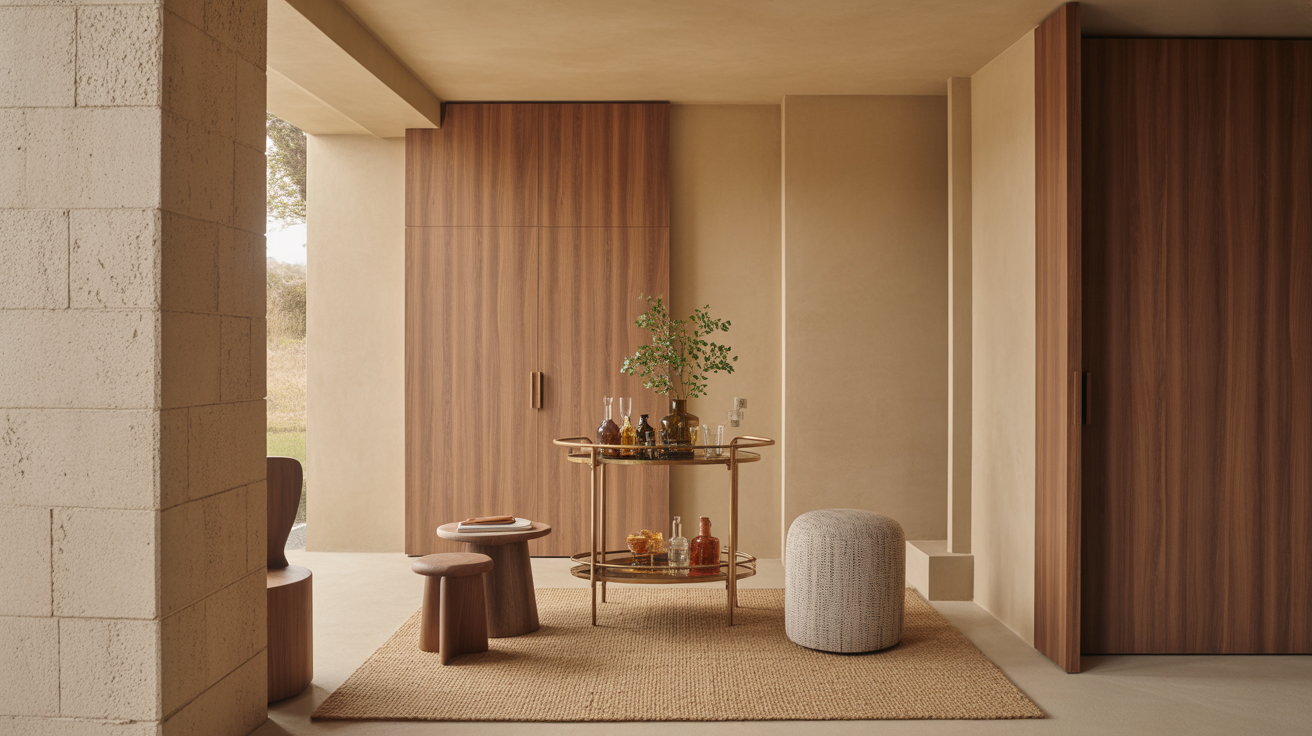
Bar cart styling that's beautiful and usable: the three-zone setup, what to actually stock, the rule of three, and how to keep it from looking cluttered.
A bar cart should be two things at once: a working station you can actually pour a drink from, and a small, considered display that looks finished when no one's drinking. The trick is treating it in zones — bottles, glassware, and styling — and resisting the urge to cram every bottle you own onto two shelves. Done well, a bar cart is one of the highest-impact, lowest-commitment styling pieces in a home. Here's how to set one up and style it so it works as hard as it looks.
What a bar cart is really for
Before styling, decide the job. A bar cart can be a genuine drinks station, a coffee-and-tea cart, a display surface that occasionally pours, or a flexible side piece you roll out when guests arrive. Most home carts are a blend of the first and third — usable for a cocktail, pretty enough to leave out.
That dual purpose drives every decision below. Everything on the cart should either do something or look like it belongs, ideally both. The bottle is functional and handsome. The cocktail book is decorative and useful. The third decorative object earns its spot by tying the whole thing together.
The three-zone setup
Think of the cart in three zones and it organizes itself. Most carts have two shelves; the top is for working and showing, the bottom is for backup and weight.
| Zone | What lives there | Notes |
|---|---|---|
| The bottle zone | 4–6 spirits or your go-to bottles | Tallest at the back, label-forward |
| The glassware zone | The glasses you actually use | A few of each, not a full cabinet |
| The styling zone | One or two decorative objects | The piece that makes it feel intentional |
| Bottom shelf | Backup bottles, mixers, books, a tray | Heavier items low for stability |
The principle that keeps it usable: put the things you reach for most within easy reach, and let the bottom shelf carry the overflow and the weight. A cart that's all display and no function gets ignored; a cart that's all bottles and no styling looks like storage.
What to actually stock
You don't need a commercial back bar. A small, intentional selection looks better and gets used more. A solid starting kit:
- A handful of spirits. Four to six covers most home cocktails — typically a clear spirit, a brown spirit, and a couple of your own favorites. Choose bottles you like the look of; the bottle is part of the styling.
- One or two mixers kept on the lower shelf or nearby.
- The tools that earn their place: a shaker, a jigger, a bar spoon, a strainer. A small tool roll or caddy keeps them tidy.
- Glassware you'll genuinely use: a few rocks glasses and a few stemmed glasses is plenty for most homes. Match the glassware to what you actually drink.
- The finishing details: cocktail napkins, a small dish for citrus or garnish, a cloth for wiping down.
The non-drinker's version works just as well: swap spirits for a kettle, a coffee maker or French press, tea tins, and nice mugs. The zones don't change.
Styling it: the rules that make it look designed
Once it's stocked, a few styling principles turn a functional cart into a beautiful one. These are the same principles that make any vignette work.
- Vary the heights. Tall bottles and a tall vase or bud vase at the back, glassware and shorter objects in front. A flat, same-height row reads as a shelf; varied heights read as styled.
- Use the rule of three. Group objects in odd numbers — three is the friendliest. A bottle cluster, a stack, and a single tall element is more relaxing to look at than everything spaced evenly.
- Add one organic element. A small plant, fresh greenery, a bud vase with a single stem, or a bowl of citrus. One living thing keeps a cart from feeling like a liquor display. This is the touch most people skip and the one that matters most.
- Corral with a tray. A small tray on the top shelf gathers the bottles or the tools into one tidy group and gives the eye a resting place. It also makes the whole cart feel curated rather than scattered.
- Repeat a metal or a tone. Let the cart's frame, the bar tools, and a metallic object share a finish — all warm brass, or all matte black — so the metals look chosen rather than collected. The same restraint that works across a styled dining table applies here.
Keep it from looking cluttered
The most common bar cart mistake is overcrowding. A cart with empty space looks intentional; a cart with no breathing room looks like a junk shelf. A few guardrails:
- Edit ruthlessly. If a bottle is nearly empty, decorative-only, or you never pour it, move it to a cabinet. The cart is a highlight reel, not the full collection.
- Leave negative space. Aim to fill roughly two-thirds of each shelf and leave a third open. The empty space is what makes the objects look styled.
- Group, don't scatter. Three tight clusters look calmer than a dozen evenly spaced items. Cluster the bottles, cluster the glasses, set the styling object slightly apart.
- Mind the sightline. A cart often sits in the open, so style the side people see first. Keep the back functional and the front considered.
Placement and practical notes
Where the cart lives matters as much as how it's styled:
- Give it a wall or corner anchor. A cart floating in the middle of a room looks unmoored. Park it against a wall, beside a sofa, or near where people gather.
- Use the wheels. The whole point of a cart is that it moves. Roll it to the gathering when you host and return it after — that mobility is its superpower.
- Light it nearby. A small lamp or a sconce near the cart turns it into an evening feature. Warm light on glassware is quietly lovely.
Shop this guide
- Black Bar Cart With Wine Storage
- Set of 4 Clear and Green Palm Tree Acrylic Stemmed Glasses
- Set of Two Gray And Natural Solid Wood Handmade Round Risers
The short version
- Set the cart in zones: bottles, glassware, styling up top; backup and weight on the bottom shelf.
- Stock light — four to six bottles, the glasses you use, basic tools, and the finishing details.
- Style with varied heights, odd-numbered groupings, a tray to corral, and one organic element.
- Leave a third of each shelf empty and group items in clusters so it reads as designed, not cluttered.
- Anchor it to a wall or corner, light it warmly, and use the wheels when you host.
A well-styled cart is decor that works. Shop decor — trays, vessels, glassware, and the small finishing pieces that turn a bar cart into a feature.
Frequently asked questions
What should I put on a bar cart?
Work in zones: four to six bottles you like the look of, the glassware you actually use, basic bar tools, and one or two decorative objects. Keep mixers and backup bottles on the lower shelf, and add one organic element like a plant or fresh citrus.
How do you style a bar cart so it doesn't look cluttered?
Edit down to what you use and love, fill about two-thirds of each shelf and leave a third open, and group items in tight clusters rather than spacing them evenly. Vary the heights and add a tray to corral the bottles. Negative space is what makes it look styled.
What's the rule of three for styling a bar cart?
Group objects in odd numbers — three is the most pleasing. A cluster of bottles, a short stack (like cocktail books), and one tall single element such as a bud vase creates the varied, relaxed look that designers use on any vignette.
Can a bar cart be non-alcoholic?
Absolutely. Swap spirits for a coffee setup, tea tins, a kettle, and nice mugs, or stock it with mixers, sparkling water, and garnishes. The three-zone setup and styling rules work exactly the same for a coffee or mocktail cart.
How many bottles should be on a bar cart?
Four to six is the sweet spot for most homes — enough to make common drinks, few enough to look curated. Keep your everyday pours up top and move overflow or rarely-used bottles to a cabinet so the cart stays a highlight reel.