Comparisons
How to Plan and Hang a Gallery Wall (with Real Spacing Numbers)
6 min read
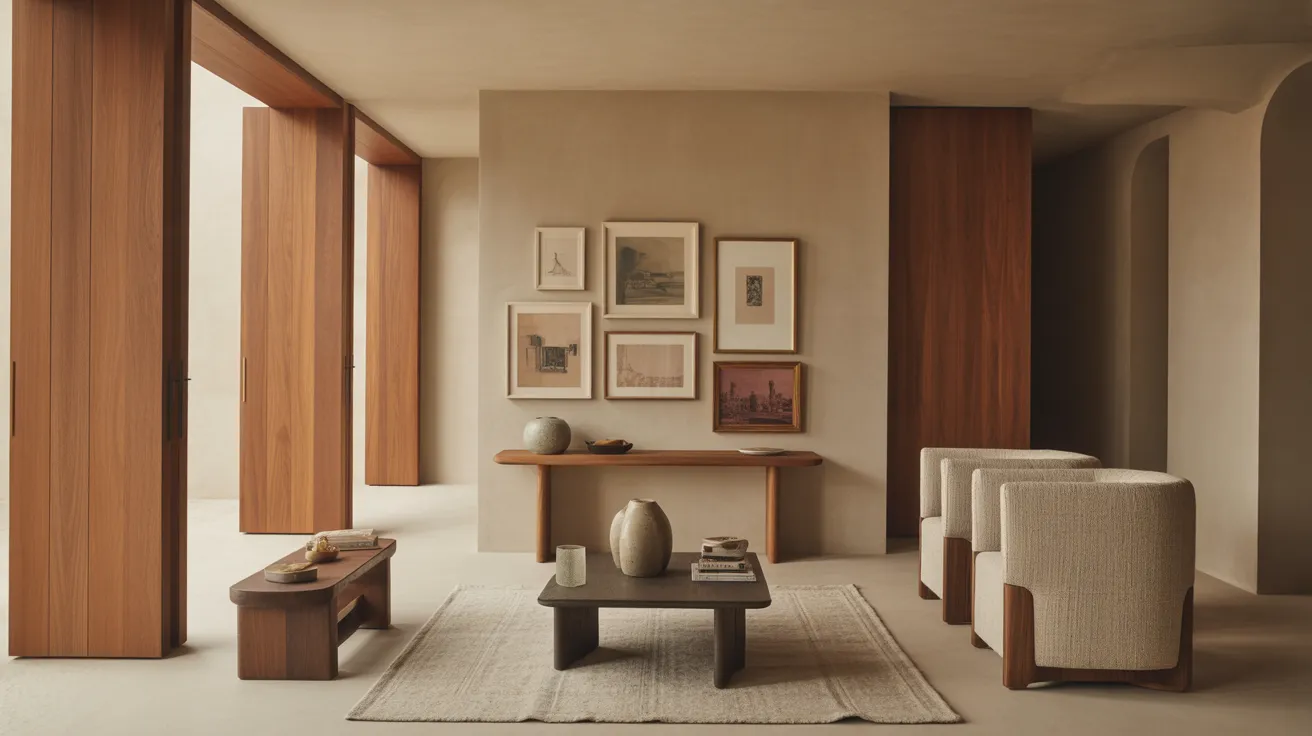
How to make a gallery wall that looks intentional: a paper-template method, real spacing numbers, the 57-inch center rule, and layouts that actually work.
A gallery wall looks effortless and is anything but — which is good news, because that means it's a process you can follow rather than a knack you either have or don't. Plan the layout on the floor, transfer it to paper templates on the wall, and hang to a consistent spacing and a fixed center height. Get those three steps right and the result reads as composed instead of scattered.
This guide walks through the planning, the spacing numbers, and the hanging method that keeps you from filling a wall with nail holes.
Step 1: Choose a layout before you choose a wall
Gallery walls fall into a few reliable structures. Pick one before you start, because the layout determines how forgiving the spacing needs to be.
- The grid. Identical or same-size frames in even rows and columns. Crisp, calm, and the most forgiving of all — equal spacing does the work. Best for a collection of similar pieces (prints, photos in matching frames).
- The salon (organic) wall. Mixed sizes and orientations arranged around a central anchor. Looks collected and lively, but demands careful spacing to avoid chaos. Best for a varied mix you've gathered over time.
- The row. A single horizontal line of frames, centered on a consistent midline. Elegant above a sofa, console, or bed, and very easy to get right.
- The stacked pair or column. Two or three frames stacked vertically. Good for narrow walls and tight spaces.
A gallery wall wants a host. The strongest ones sit above a piece of furniture — a sofa, console, bench, or bed — which gives the composition a base and a width to relate to. Free-floating gallery walls in the middle of a blank wall are harder to land.
Step 2: The spacing numbers
Consistent gaps are the single thing that separates a designed wall from a random one. Memorize these.
| Element | Target |
|---|---|
| Center of the whole arrangement (eye level) | 57–60" from floor |
| Gap between frames | 2–3" (keep it consistent) |
| Gallery width above furniture | About ⅔ to ¾ of the furniture's width |
| Bottom of lowest frame above a sofa/console back | 6–10" |
| Bottom of lowest frame above a bed headboard | 4–8" |
| Frame edge to a side wall or corner | At least 6–8" |
Two numbers carry the result. The 57-inch center is the museum standard — galleries hang art so its center sits at average eye level, and a gallery wall works the same way: the visual center of the whole group, not any single frame, lands around 57–60 inches. The 2–3 inch gap is the other one — keep it identical between every pair of frames, including the diagonal gaps in a salon wall, and the eye reads the group as one object.
A common error is treating each frame's top as the alignment line. Don't. Align to the consistent gap and the overall center; let the tops fall where they fall.
Step 3: Plan on the floor, transfer to paper
This is the step that saves your walls. Never hang frame-by-frame and adjust on the fly — you'll end up with a constellation of holes.
- Lay it out on the floor. Clear a floor space the size of your wall (use painter's tape to mark the furniture width below). Arrange the real frames until the composition feels balanced — bigger and darker pieces tend to want to be lower and more central; lighter ones drift up and out.
- Trace paper templates. Cut a piece of kraft paper or newspaper to the exact size of each frame. Mark where the hanging hardware (the hook or wire pull) sits on the back of each — measure from the top of the frame down to where the nail will actually catch.
- Tape the templates to the wall. Recreate your floor layout in paper, keeping the 2–3" gaps and the 57–60" center. Step back, live with it for a day, adjust freely. Paper moves; nail holes don't.
- Hang through the paper. Drive each nail or hook straight through the marked point on its template, then tear the paper away. Every frame lands exactly where you planned.
A few practical notes: use a level on each frame as you hang, use two hanging points per frame for anything wider than about 20 inches (it stays straight on its own), and choose the right hardware for your wall — heavy frames into a stud or proper anchor, light frames into drywall hooks. Renters can use damage-free strips for lighter pieces, though they're less reliable for glass-fronted frames.
Layout starters that work
If you're staring at a blank wall, these reliable arrangements give you a place to begin:
- Three in a row above a sofa or console — equal frames, equal gaps, centered. Hard to get wrong.
- The 2x3 grid — six matching frames, two columns of three. Clean and graphic.
- Anchor plus orbit — one large piece slightly off-center, with smaller frames clustered around it at consistent gaps. The classic salon look.
- The stacked column — two or three frames stacked beside a doorway or in a narrow slot of wall.
Whatever you choose, vary the content more than the frames if you want calm: a mix of art, photos, and one textile or object reads richer, but keeping frames in one or two finishes (warm wood, matte black, thin metal) holds it together. The same restraint that makes a coffee table look styled rather than cluttered applies here — repetition in the frames, variety in what's inside them.
Shop this guide
- Set Of Two Beauty 2 Black Framed Print Wall Art
- Set Of 2 Tea Apples and Strawberries Black Framed Wall Art
- Set Of 4 Red Barn For The Season Black Framed Print Wall Art
The short version
- Pick a layout first: grid, organic salon, single row, or stacked column.
- Hang the group's visual center at 57–60", with a consistent 2–3" gap between every frame.
- Span about two-thirds to three-quarters of the furniture below, with the bottom row 6–10" above it.
- Plan on the floor, trace paper templates, tape them up and adjust, then hang straight through the paper.
- Vary the content, limit the frame finishes, and use two hanging points on anything over 20" wide.
A gallery wall is only as good as the pieces in it. Shop decor — frames, art, and the finishing touches that turn a blank wall into a focal point.
Frequently asked questions
How high should you hang a gallery wall?
Center the whole arrangement so its visual middle sits about 57–60 inches from the floor — average eye level, the same standard galleries use. Above furniture, also keep the bottom row 6–10 inches above a sofa or console back so the two read as connected.
How much space should be between frames on a gallery wall?
Two to three inches, kept consistent between every pair of frames. Tighter than 2" looks cramped; wider than about 3" makes the group fall apart into separate pieces. Consistency matters more than the exact number.
How big should a gallery wall be over a sofa?
Aim for the arrangement to span about two-thirds to three-quarters of the sofa's width. Wider than the sofa looks top-heavy; much narrower looks stranded. Center it on the sofa, not the wall, if the two aren't aligned.
How do you plan a gallery wall without making holes?
Arrange the real frames on the floor first, then cut paper templates the exact size of each frame, mark where the hanging hardware sits, and tape the templates to the wall. Adjust the paper freely, then hang each nail straight through its template.
Do gallery wall frames need to match?
No — but limiting frames to one or two finishes (say, warm wood and matte black) keeps a varied collection from looking scattered. Vary what's inside the frames more than the frames themselves for a look that's collected but calm.